 Save
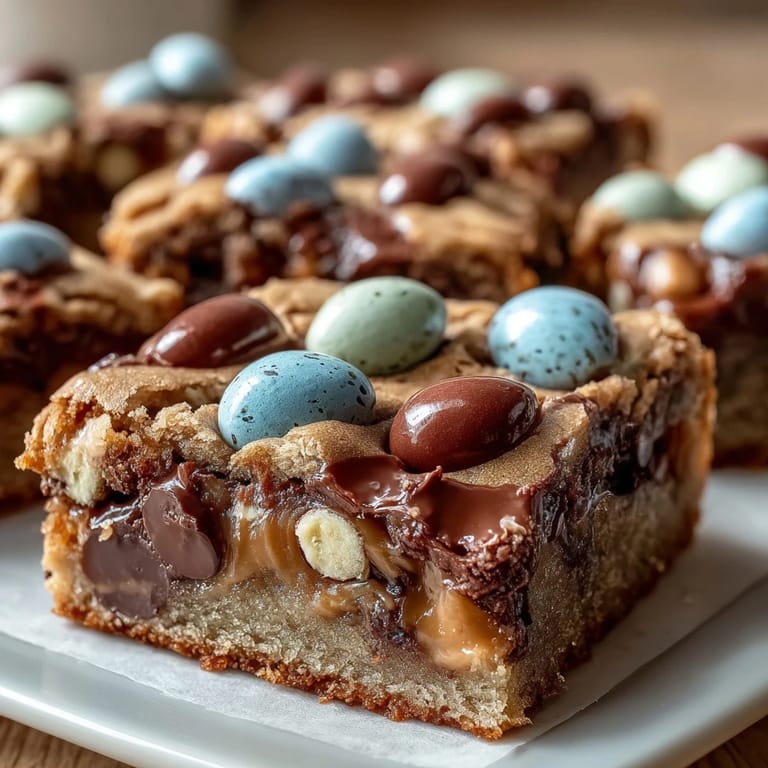
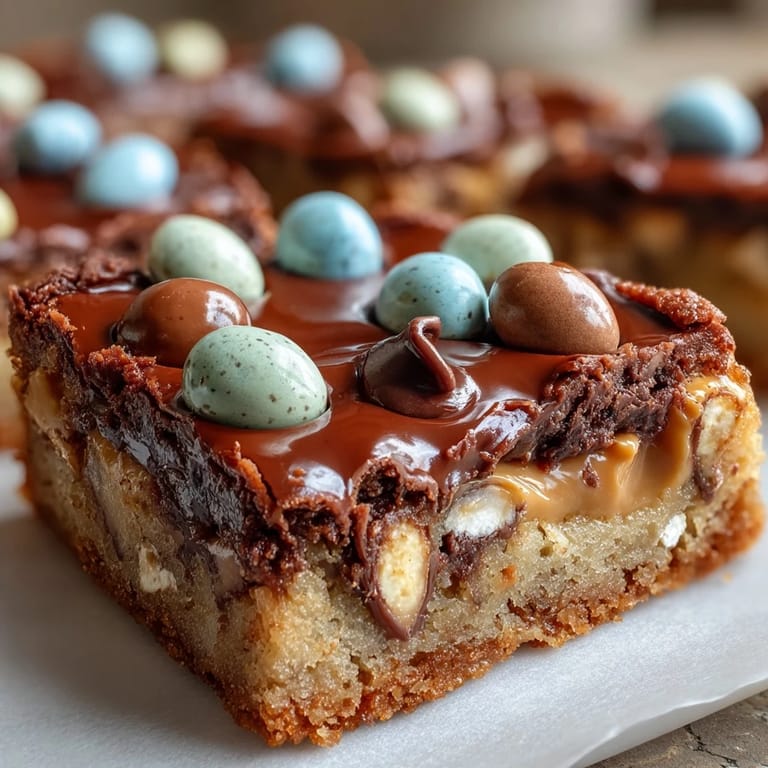
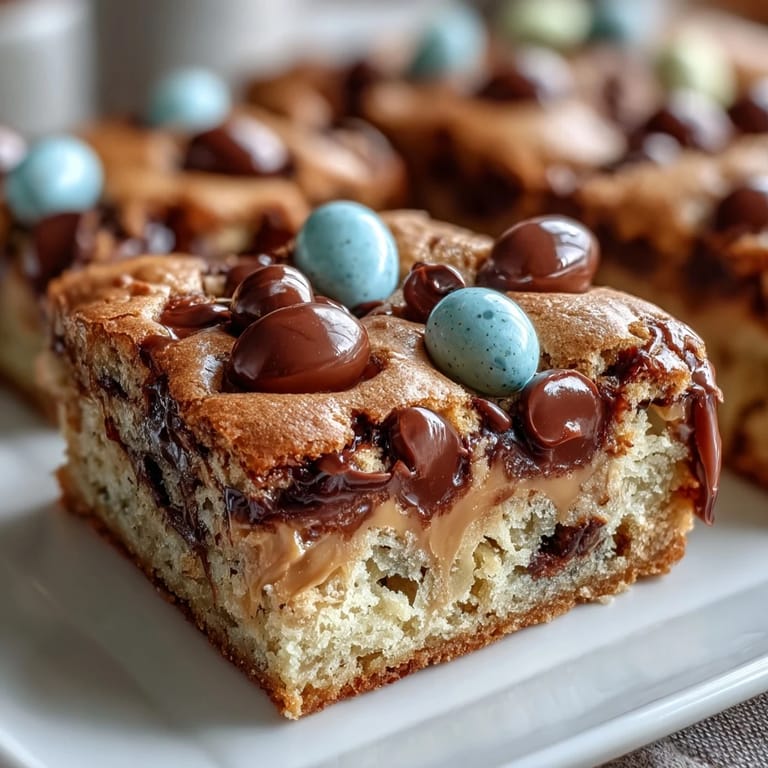
Save One spring afternoon, the kitchen was alive with the sound of egg-shaped candies tumbling onto the countertop, and their pastel shells seemed almost too cheerful to eat. I first tried these peanut butter Easter egg cookie bars when my neighbor brought over a plate just as the daffodils began blooming—her simple gesture became a delicious invitation to recreate the treat myself. As the aroma of warm peanut butter filled my apartment, I found myself quietly humming along to music while fussing over the color pattern of the candies on top. There's genuine joy in crafting something that's both chewy and bright, especially when you know every bite holds a surprise. That day, cookie bars officially replaced traditional cookies for our spring gatherings.
Baking them for a group of friends on a rainy March afternoon, I caught a few giggles when someone discovered an extra cluster of chocolate eggs hiding in their bar. The kitchen quickly became a mess of wrappers and empty bowls, but no one minded. We crowded around the cooling pan, careful not to burn our fingers, just waiting for the signal that they could be sliced. Sharing these bars felt less about the dessert and more about pausing together, tasting the season in each bite.
Ingredients
- Unsalted butter: Melted and slightly cooled, it ensures each bar is tender without overpowering the peanut butter flavor; I learned that using unsalted lets you control the saltiness.
- Creamy peanut butter: The star ingredient for chewy texture and rich taste; a quick stir makes it blend seamlessly.
- Light brown sugar: Packed for deeper caramel notes; pressing it in the measuring cup prevents guesswork.
- Granulated sugar: Adds crisp edges and balances out the brown sugar’s moisture.
- Eggs: Room temperature eggs whip in smoothly for a uniform batter.
- Vanilla extract: Just a teaspoon rounds out the sweetness and aroma; measure carefully for the best flavor.
- All-purpose flour: The foundation—be sure to spoon and level it, so the bars don’t turn dense.
- Baking powder: Helps lift the bars for a soft texture; check it’s fresh before adding.
- Baking soda: Adds extra lift and a bit of chewiness, especially with brown sugar.
- Salt: Balances the sweet richness; a pinch goes far.
- Easter egg chocolate candies: Their crunch and color bring spring right into your kitchen—press a few extra on top for a festive look.
- Semi-sweet chocolate chips (optional): For those who can’t resist extra chocolate pockets, just scatter them in.
Tired of Takeout? 🥡
Get 10 meals you can make faster than delivery arrives. Seriously.
One email. No spam. Unsubscribe anytime.
Instructions
- Prepare the pan:
- Line your 9x9-inch baking pan with parchment paper, leaving a little overhang for a dramatic, easy lift later.
- Mix the wet ingredients:
- Whisk melted butter, peanut butter, brown sugar, and granulated sugar in a big bowl until glossy and smooth; savor that peanut aroma when you’re stirring.
- Add eggs and vanilla:
- Crack in the eggs and pour the vanilla, then whisk until everything’s silky and unified—it should look thick but pourable.
- Combine dry ingredients:
- In a separate bowl, whisk together flour, baking powder, baking soda, and salt—a few gentle swirls do the trick.
- Fold wet and dry together:
- Using a spatula, gently fold the dry mix into the wet, watching for the moment when the dough just holds together; don’t overmix.
- Stir in mix-ins:
- Gently fold in Easter egg candies and chocolate chips, savoring the confetti-like colors swirling through the batter.
- Spread and decorate:
- Spoon the dough into your pan and smooth it gently, then press extra candies on top for a playful spring effect.
- Bake:
- Slide the pan into the oven—bake 22-25 minutes, until the edges are golden and the center feels soft when touched.
- Cool and serve:
- Let the bars cool fully in the pan, then lift them out using the parchment; slice and reveal those hidden candy gems before serving.
 Save
Save The first time these bars graced our dessert table, the kids rushed to identify which color egg they would get, their excitement infectious. It was such an easy way to bring everyone together, with the simple act of slicing bars somehow creating a moment that lingered at the edge of ordinary days.
How to Store and Keep Them Fresh
I found that a metal tin lined with parchment holds the bars beautifully for days, keeping them soft and flavorful. Just stack them with a bit of paper between the layers, and resist the urge to peek too often—the smell will tempt you every time.
Getting Kids Involved
Letting kids press the candies into the dough transforms the process into a game, and honestly, some of the most creative patterns emerge this way. The anticipation builds even more when they see their handiwork baked into each slice.
Swaps for Every Season
These bars don’t need to be just for Easter—swap the egg candies for regular chocolate bits, chopped nuts, or fall-colored candies so you can bake them for any holiday or just because you want a treat.
- If you’re out of peanut butter, almond butter works wonders.
- Mini marshmallows add gooey texture for summertime.
- Don’t forget: room temperature eggs keep the batter smooth.
 Save
Save Every batch brings a splash of spring color and irresistible peanut-chocolate richness. I hope these bars become your go-to treat for joyful gatherings, or just for making an ordinary day a little sweeter.
Recipe FAQ
- → Can I substitute the Easter egg candies?
Yes, you can use regular chocolate candies like chocolate chips or M&Ms for a different flavor or to make them year-round.
- → How do I achieve soft, chewy bars?
Bake just until the edges are golden and the center is set but still soft. Avoid overbaking to maintain a chewy texture.
- → How should the bars be stored?
Keep bars in an airtight container at room temperature for up to four days to maintain freshness and texture.
- → Is there a way to enhance peanut butter flavor?
Drizzle melted peanut butter over the cooled bars for extra richness and creamy flavor.
- → Can I make this dessert ahead of time?
Yes, you can prepare and bake the bars a day in advance. Cool completely and store in an airtight container before serving.
- → Are these bars suitable for vegetarians?
Yes, the bars are vegetarian-friendly. Always check candy labels for any animal-derived ingredients.